Setup Filters in a SLR Film Camera for use with a Digital Back
- Nikon FE & Sony Nex 3 Digital Back

For the sensor to be at the exact Film Plane for perfect focus, it needs to be viewing through either the IR Filter combination that was original on the sensor, or through some plain glass if you intend to shoot infra red photography. Without these filters the sensor would need to be rebated further into the film box and would probably interfere with the camera shutter. The filters do provide a bit of focus for the sensor. My theory is that maybe by moving the filters behind the SLR shutter, hence further from the sensor, decreases the amount that the sensor needs to be rebated into the film box.
I experimented with a few options and eventually used a thin gauge builders flashing section which already had a 90 degree bend. This is cut to a size that is just a bit wider than the inside measurement of the SLR shutter box and not so high that it causes mirror lockup.
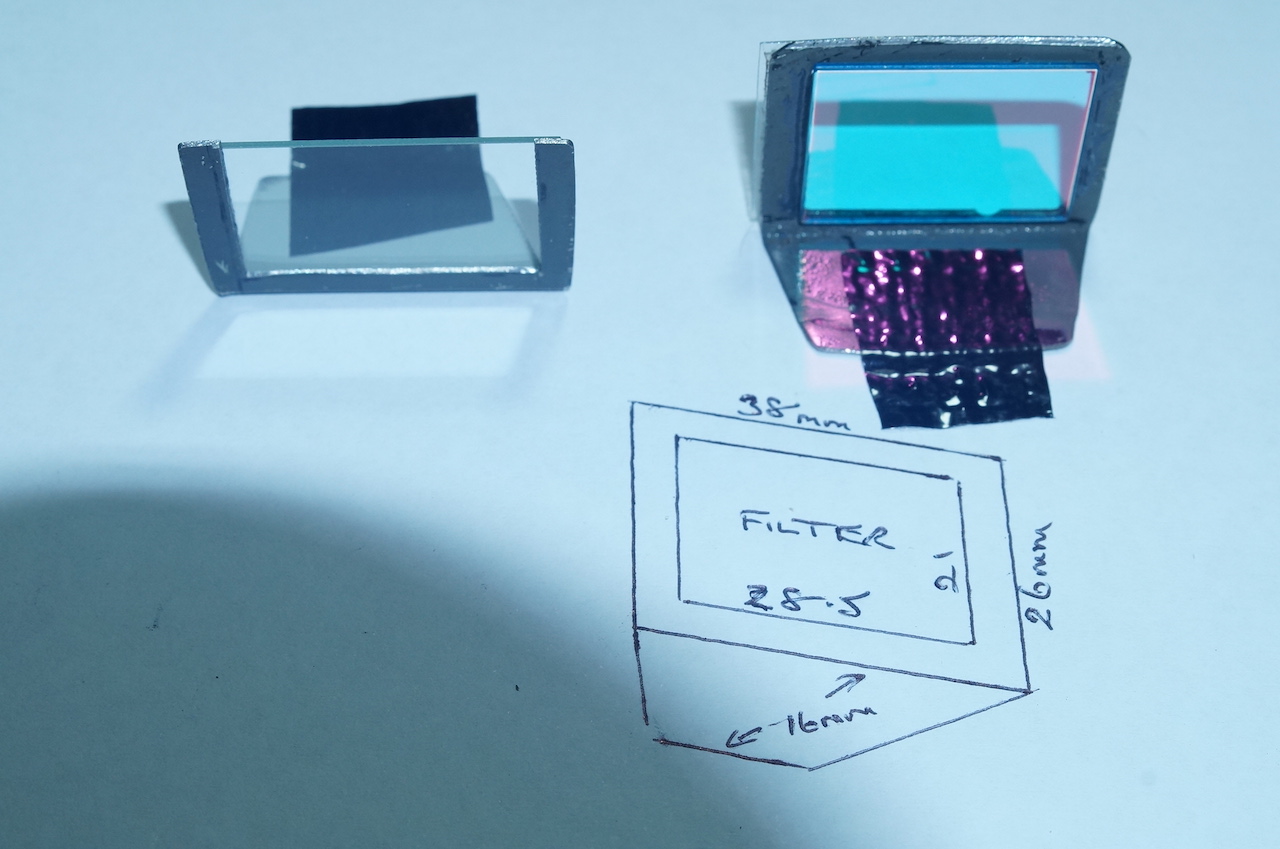
The right side filter is the original IR combo filter. The inside of the frame is cut at almost the same height as the filter but the sides are just short so that the filter can be glued in place at the sides. I used a 2 part metal epoxy dabbed in with a tooth pic. You can see that I have widened the frame on one side with some thin plastic glued to the frame. This was because my sensor is off centre but I needed to get the width spot on otherwise the frame drops into the shutter area. The measurements shown are for a Nikon FE and are probably the same for Nikon FE2, FA & FM models.
The left side filter is made from 1mm microscope slide and this seems to have been enough to obtain reasonably good focus when using the bare sensor for infra red photos. Other glass plate filters could be made for different light spectrums if desired.
To install the filter, turn the speed to Bulb, screw in a remote cable, trigger the shutter then tighten it to hold the shutter open. Now the filter can be slipped in on an angle and then up behind the shutter hinge. I tweak it a bit with a toothpick so it's sitting nicely each side and not fallen into the shutter area. Then just press down on the black tape to hold it in position. Release the shutter and check with a few shots that there is no shutter or mirror lockup. Also check that the mirror is dropping back down to its correct position.
- This side is up against the shutter frame facing the sensor
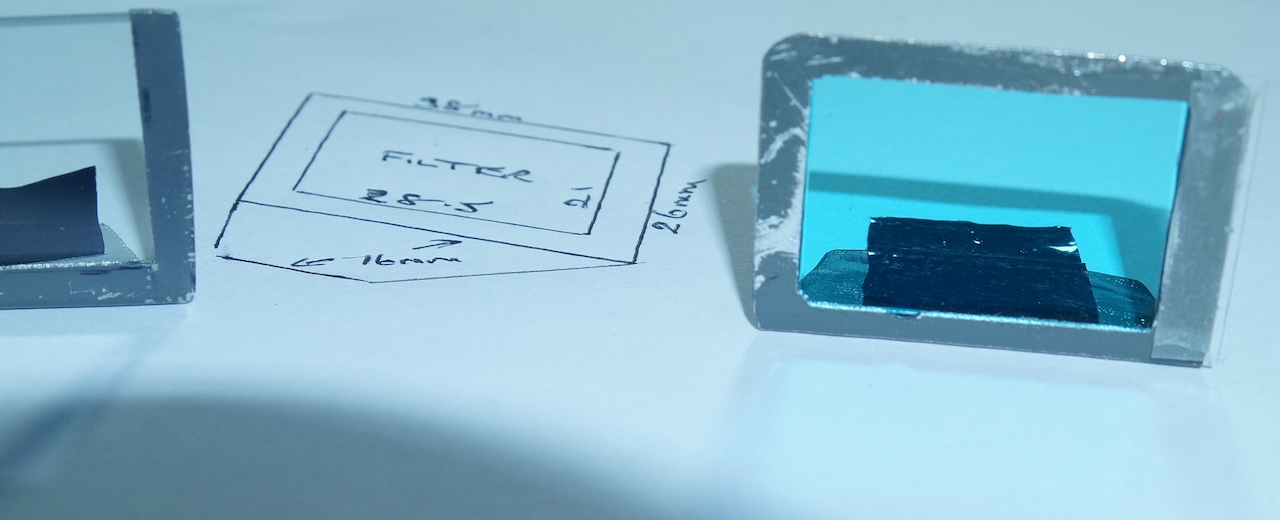
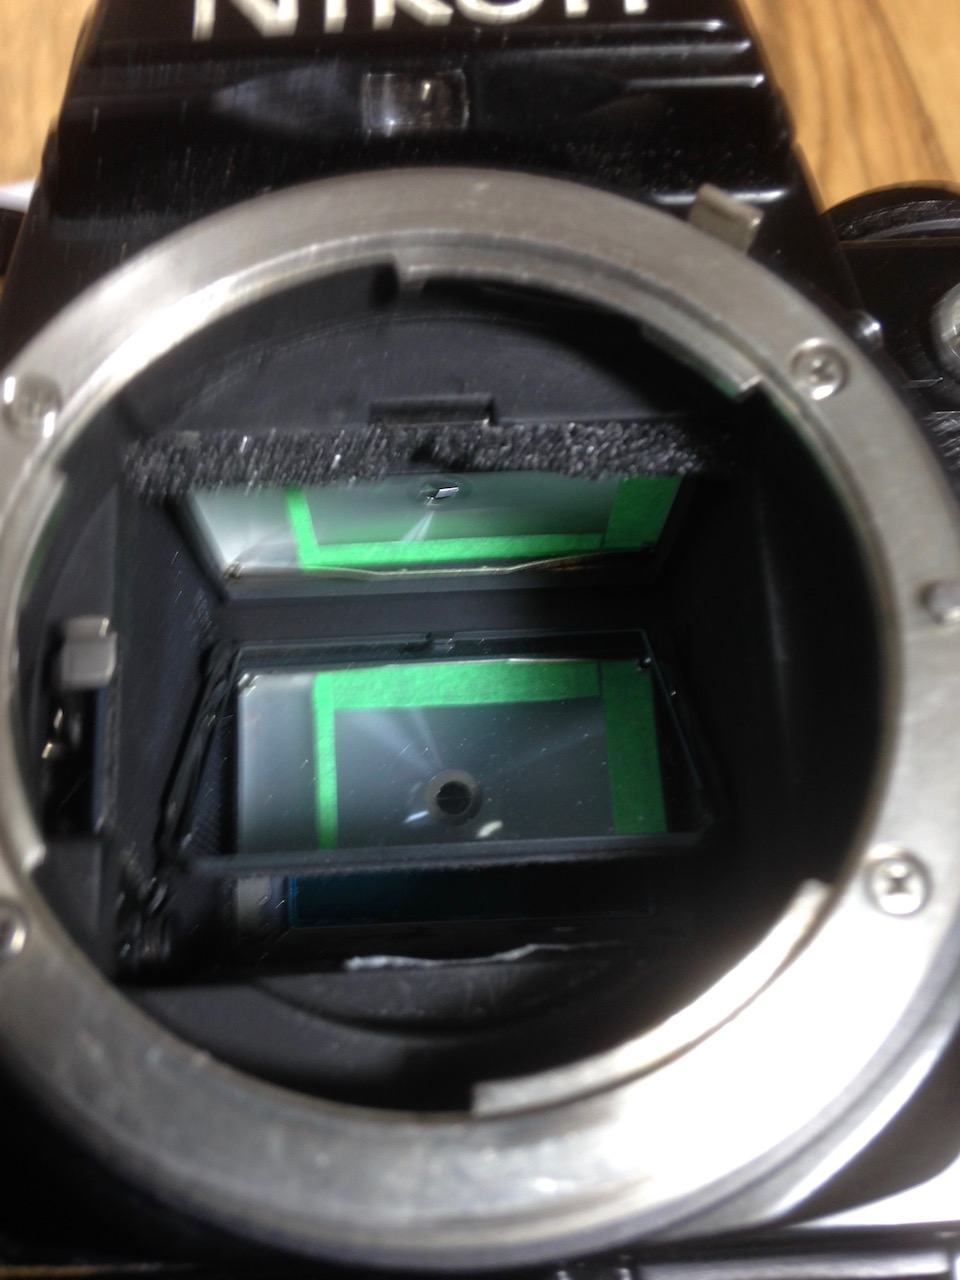
- Filter frame in position behind the mirror. Tweak the position with a tooth pic so it is sitting on each side of the shutter frame and hard down to the base. Then stick down the tape. You can see it is now lined up with the sensor in the film back on the other side of the SLR shutter assembly.
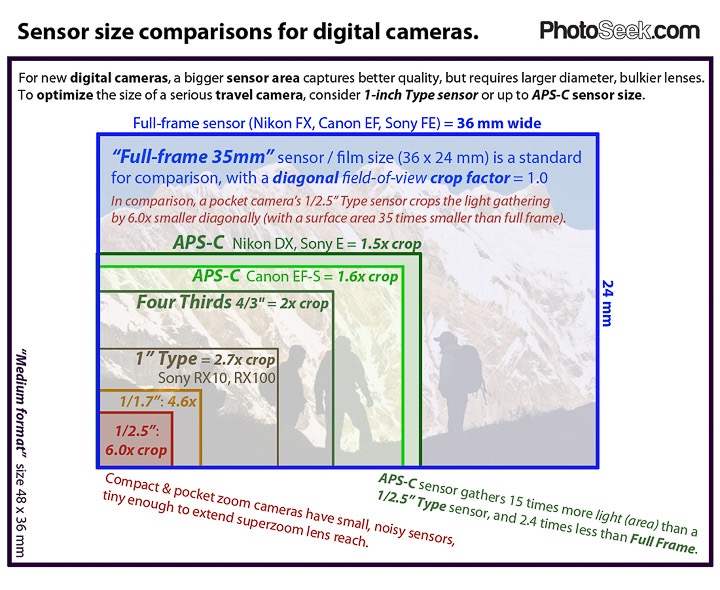
Taking pictures with a 1.5 crop sensor when looking through a full frame 35mm viewfinder is a bit hit or miss. It is hard to judge where the cutoff edges will be. This borrowed photo shows the relationship between the various sensor sizes and you can see that the Sony APS-C sensor is a fair bit smaller than 35mm. To solve this problem I experimented with various inserts into the viewfinder area. In the end the best method was to use a very light painters masking tape and stick this onto the smooth convex side of the opaque glass viewfinder focusing screen which is removable on the Nikon FE.
- The top and bottom measurements will be consistent wherever your sensor is. The side tape will need to be adjusted to the location of your sensor. Note I left plenty of light around the light meter area which is a vertical side bar in the Nikon. I have found this frame to be fairly accurate at various distances with a Nikkor Zoom lens 35-135.
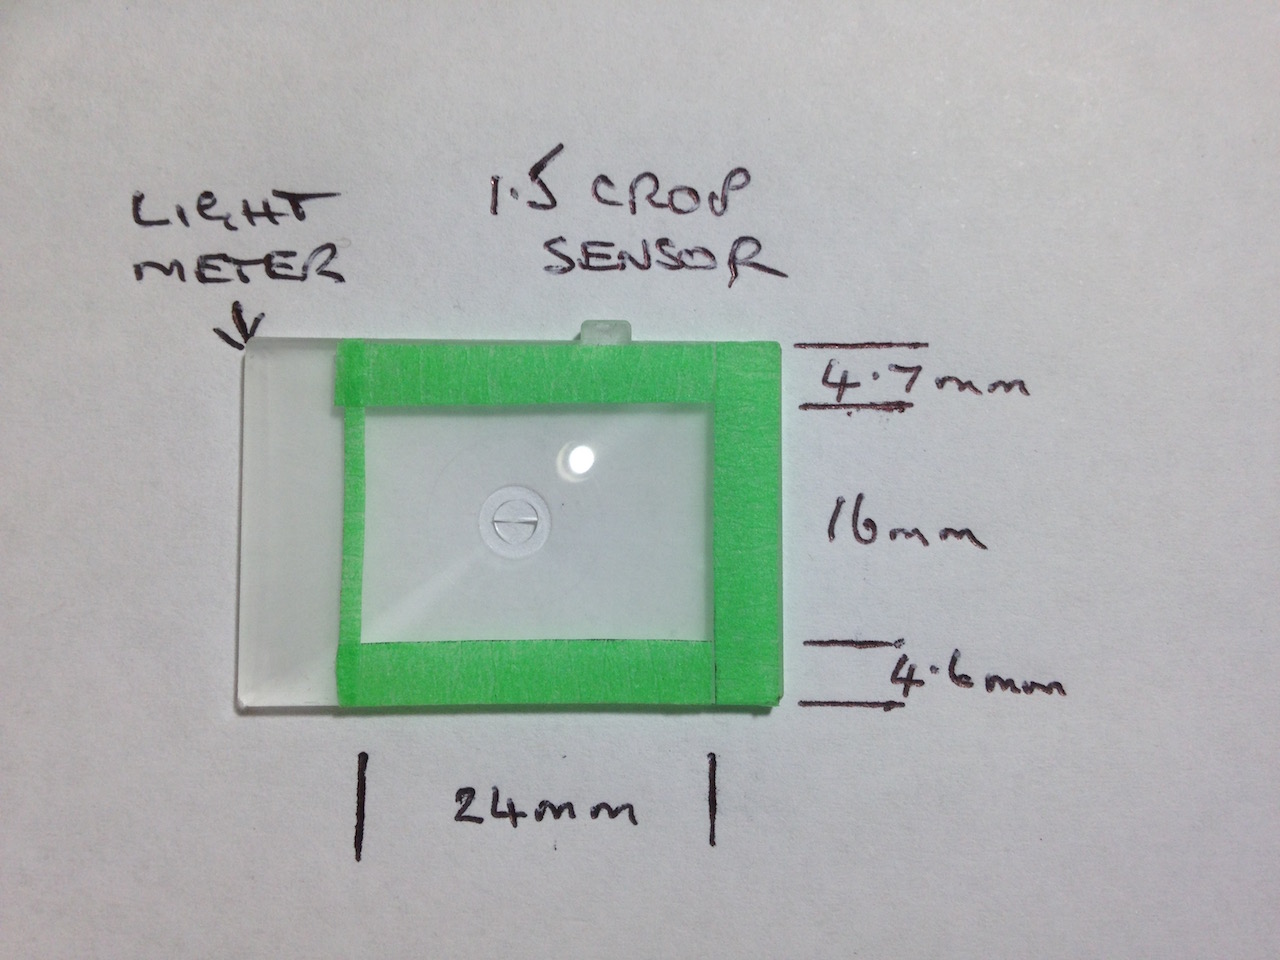
This setup has worked very well and I can now accurately frame my shots without cutting off heads and legs! The inside rectangle is pretty much the same size of the sensor filters.
- Looking into the camera mirror, the viewfinder can be seen with the adjusted framed area. Looking through the viewfinder the green tape just appears black. The tape is very non-tacky so as not to damage the viewfinder.
I trust this of interest and assists with your SLR camera conversion to digital.
No comments:
Post a Comment